
Materials:
- 1 yard of fabric at least 45” wide
- 11’ of Hoop Wire
- 12 Hoop Wire Boning Tips
- Boning Channels: 4 yards of ¾” – 1” Twill tape.
- Waistband: 1-2 yards of 1” belting or 2-4 additional yards of twill tape.
- D-Rings or belt buckle for waistband (Optional)
Note: Grosgrain ribbon is not recommended as a substitute for the twill tape or belting.
Reconstructing History Pattern #832 Pattern Piece Notes:
Pocket Hoops Inside – I added ½” to make a ¼” rolled hem to finish this edge. Note: Next time I will add a total of 1 ½” to allow for a rolled hem and to also add reinforcement for the top boning channel.
Pocket Hoop Side

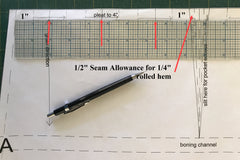
- Mark the 3/8” seam allowance on the bottom and sides
- On the bottom either add 3/8” to the length of the pattern or move the boning channel up 3/8” as the seam allowance is missing.
- Mark the Center Front on the bottom edge.
- Mark ½” seam allowance on both sides of the “slit here” line for the ¼” rolled hem.
- If you are doing gathers instead of pleats, skip this step. To mark the pleats:
- Center Pleat – Fold each side of the pocket, matching the seam allowances, to find the center of the center pleat and then mark 7/8” on each side.
- Side Pleats – Mark 1” from each seam allowance then mark 1 3/4”. Fold the pleats toward the center of the pannier.
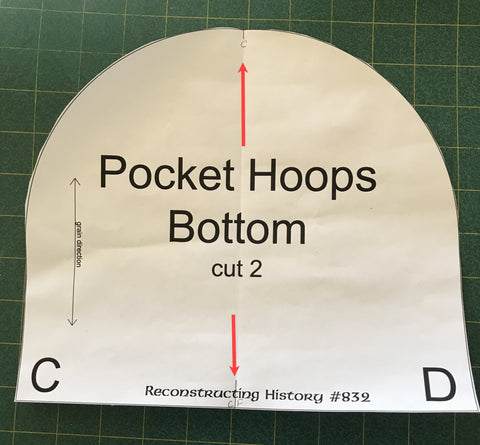
Pocket Hoops Bottom –Mark the Center on the top and bottom
Directions Notes:
These directions are based upon my experience of sewing this piece and the steps I took to create it. The pictures in the tutorial are from multiple projects, so the fabrics in the pictures will vary, but the pictures correctly show the steps and techniques.
I am not concerned about being “period accurate” when sewing historical garments. Reconstructing History has two pages of Period Stitches included with the pattern. If you would like to be period accurate, please refer to that stitching guide.
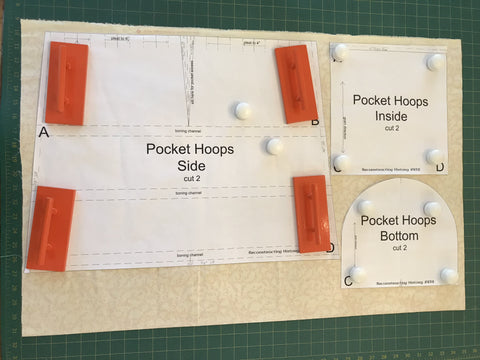
Step 1: Layout the pattern pieces and cut two each of Pocket Hoop Side, Pocket Hoops Inside, and Pocket Hoops Bottom.
Note: The Pocket Hoops Side piece is 23” wide so it will not fit on the grain of a 44” piece of fabric folded in half. To fit all the pieces on 1 yard of fabric, place the pieces on the cross grain. If you want to cut on the grain, unfold the fabric and fold the other way. The pieces will just fit.
Mark the boning channels, pleats, and centers. Cut the pocket slit on the Pocket Hoops

I use the wax tracing paper from Richard the Thread. It does not rub or iron off. If you use this tracing paper, keep in mind it is permanent so only use it in the seam allowances and on the wrong side of fabrics where it will not show.
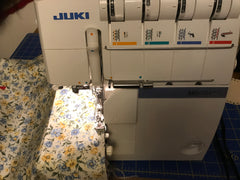
Step 2: Serge/overlock or zig zag stitch the cut edges of each piece.
Step 3 – Side pieces: Finish the edges of the pocket slit with a rolled hem by folding over ¼” twice and pressing each fold.
If you added to the top edge on the Pocket Hoops Inside pieces, finish the top edge with a rolled hem by folding over ¼” twice and pressing each fold.
Step 4: Sew down rolled hems from Step 3. A ¼” foot works very well with rolled hems.

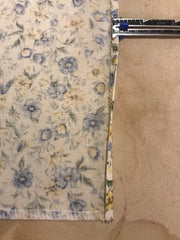
Step 5: Cut twill tape the length of each boning channel. On one end of the twill tape, make a ¼” rolled hem to use as the opening to insert the hoop wire boning. Sew onto the fabric close to the edge of the twill tape. An edge foot works well for this. I sewed onto the wrong side of the fabric and aligned the rolled hem edge in the same direction.

Step 6: Options to reduce the top edge of the panniers to 4”
- Option 1: Pleat the top edge.
- Fold and press the pleats as marked on the pattern.
- Verify the width of each side of the pocket is 4”.
- In the top seam allowance, sew across the top of the pleats to hold them in place.
- Bartack the top of the pocket opening together by dropping the feed dogs and zigzag stitch several times.

- Option 2: Gather the top edge.
- Mark the center and ¼’s of each side of the pocket.
- In the top seam allowance, sew a basting stitch between the side seam allowances.
- Bartack the top of the pocket opening together by dropping the feed dogs and zigzag stitch several times.
- Pull the basting thread to gather each side of the pocket to 4”. Use the center and ¼ marks to help distribute the gathers evenly.
- Press the gathers and sew across the top of the gather in the top seam allowance to hold them in place.

Fold and press the side seam allowances to the wrong side from the top of the pannier to the top boning channel and sew down.

Step 7: Belting Options
Finish the cut ends of the twill tape or belting for use as tying or for D-Rings as shown here.
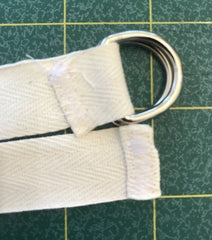

For a tutorial on making D-Ring belts or for supplies, visit Country Brook Design
Option 1: Panniers are not going to be adjustable for multiple sizes.
- Cut one piece of twill tape or belting equal to the waist measurement (over corset and any other undergarments) plus enough to either tie (about 24”) or for a D-Ring (about 9”).
- Mark the center of each side on the belting. I recommend using belting or doubling the twill tape around the waist.
- Match the center of each pocket with side center marks on the belting or twill tape and sew.
- Fold the twill tape or belting over the unfinished edge and sew down on the inside.
For options 2 and 3, cut the belting to a length that will accomodate the range of sizes needed or make multiple belts for various sizes and swap the belts out as needed. At a minimum, cut twill tape or belting equal to the waist measurement (over corset and any other undergarments) plus enough to either tie (about 24”) or for a D-Ring (about 9”).
Option 2: Panniers are going to be adjustable for multiple size. Add a casing to the back of the top of the panniers.
- Cut two pieces of fabric 1 ¾” x 4”.
- Serge or zig zag the cut edges of the fabric.
- Fold and press one long edge up ¼”.
- Right sides together, pin and sew the casing to the pannier, with the folded edge at the bottom.

- Press the pleated/gathered seam allowance toward the casing and under stitch.

- Fold the side seam allowance to the wrong side, press and sew to the top of the top boning channel.
- Fold the casing to the wrong side, press, pin and sew along the bottom edge.

- Thread the twill tape or belting through the casings and adjust the panniers so they sit at the sides of the wearer.

Option 3: Panniers are going to be adjustable for multiple size. Add a casing to the top of the panniers.
- Cut two pieces of fabric 3” x 8”.
- Serge all edges.
- Fold in ½ lengthwise & press.
- Fold & press one long edge ¼” to the wrong side.

- Right sides together, pin and sew onto the top of the pocket pannier.
- Press the seam allowance toward the casing and under stitch.
- Fold the side seam allowance to the wrong side, press and sew to the top of the inside piece.
- Fold over and stitch ¼” pressed end to the top of the pocket pannier. The finished belt casing extends above the pannier.
- Thread the twill tape or belting through the casings and adjust the panniers so they sit at the sides of the wearer.

Step 8 – Insides:
- With right sides together and the rolled hem edge of the Inside piece at the top, sew each Side to an Inside.
- Reinforce the stitching at the top.
- I marked the 3/8” seam allowance at the bottom corners and started stitching where the two 3/8” seam allowances meet. Make sure not to catch the rolled hem edge of the twill tape in the seam.

Step 9 – Bottoms:
- Align the centers of the Bottom with the Inside and Side pieces. I marked the 3/8” seam allowance on the Bottom CD edge and part way up the curved edge to find the intersecting point to match up with the Side/Inside pieces.
- Finish pinning the bottom to the Side/Inside pieces and sew making sure not to catch the bottom boning channel in the seam allowance.

Step 11 – Inserting the Hoop Wire boning
- For each boning channel, cut a piece of Hoop Wire the length of the channel minus ½”

- For each piece of Hoop Wire, put a Hoop Wire Boning Tip on each end. Optionally you can put glue in the boning tip first.
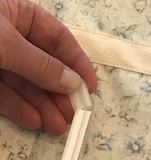
- Insert Hoop Wire with boning tips on each end into the boning channel and sew the open end closed.

- Turn the panniers right side out and twist the Hoop Wire in the casings if needed.
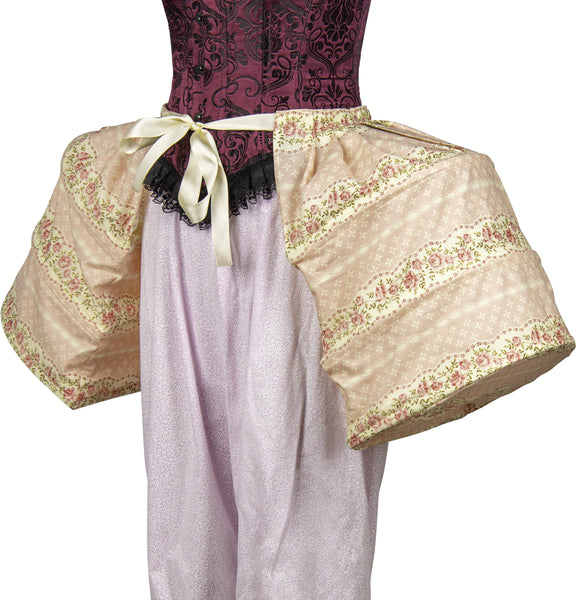
All Done!
Leave a comment
Comments will be approved before showing up.


